
baby change table turned beautiful modern drawers
- Mar 11, 2023
- 4 min read
Updated: Oct 15, 2023

This was a super fun DIY I completed 2 years ago and is a project I get asked about quite a lot, so I thought it was time to put some detail into a blog post.
These drawers started out as a simple white dresser (actually I used them as a change table for both my kids), but when we decided to change up Georgia's room as she got a little older, I wanted to give them a fresh look.
If you have an old dresser or set of drawers with flat fronts, you can absolutely use this method too.
Materials Cordless Drill or Screwdriver (for removing knobs) Protective eyewear Dust Mask Orbital Sander Sanding discs Dowels Pencil Ruler Wood Glue Masking tape Jigsaw or handsaw Caulk & caulking gun Damp Cloth Paint of choice - I used Taubmans water based semi gloss in colour Sage Craft Paint Sprayer (or bush, roller and tray)
Disclaimer: This post contains affiliate links, meaning if you purchase something through a link I've provided, I will receive a small commission. This is at no extra cost to you!
Remove drawers and knobs Take anything out from inside the drawers, remove each drawer from the unit and mark each one with the order they belong. It may not look like it, but each drawer may be slightly different with runner placement, so you want to make sure you pop them back in the same order when you're finished. Unscrew each knob and keep them somewhere safe, unless of course you're replacing them.

Lightly sand Lightly sand each drawer front and any surface you want to paint. For me, this was just the edges/sides of the drawer fronts. I used 120 grit on my orbital sander.

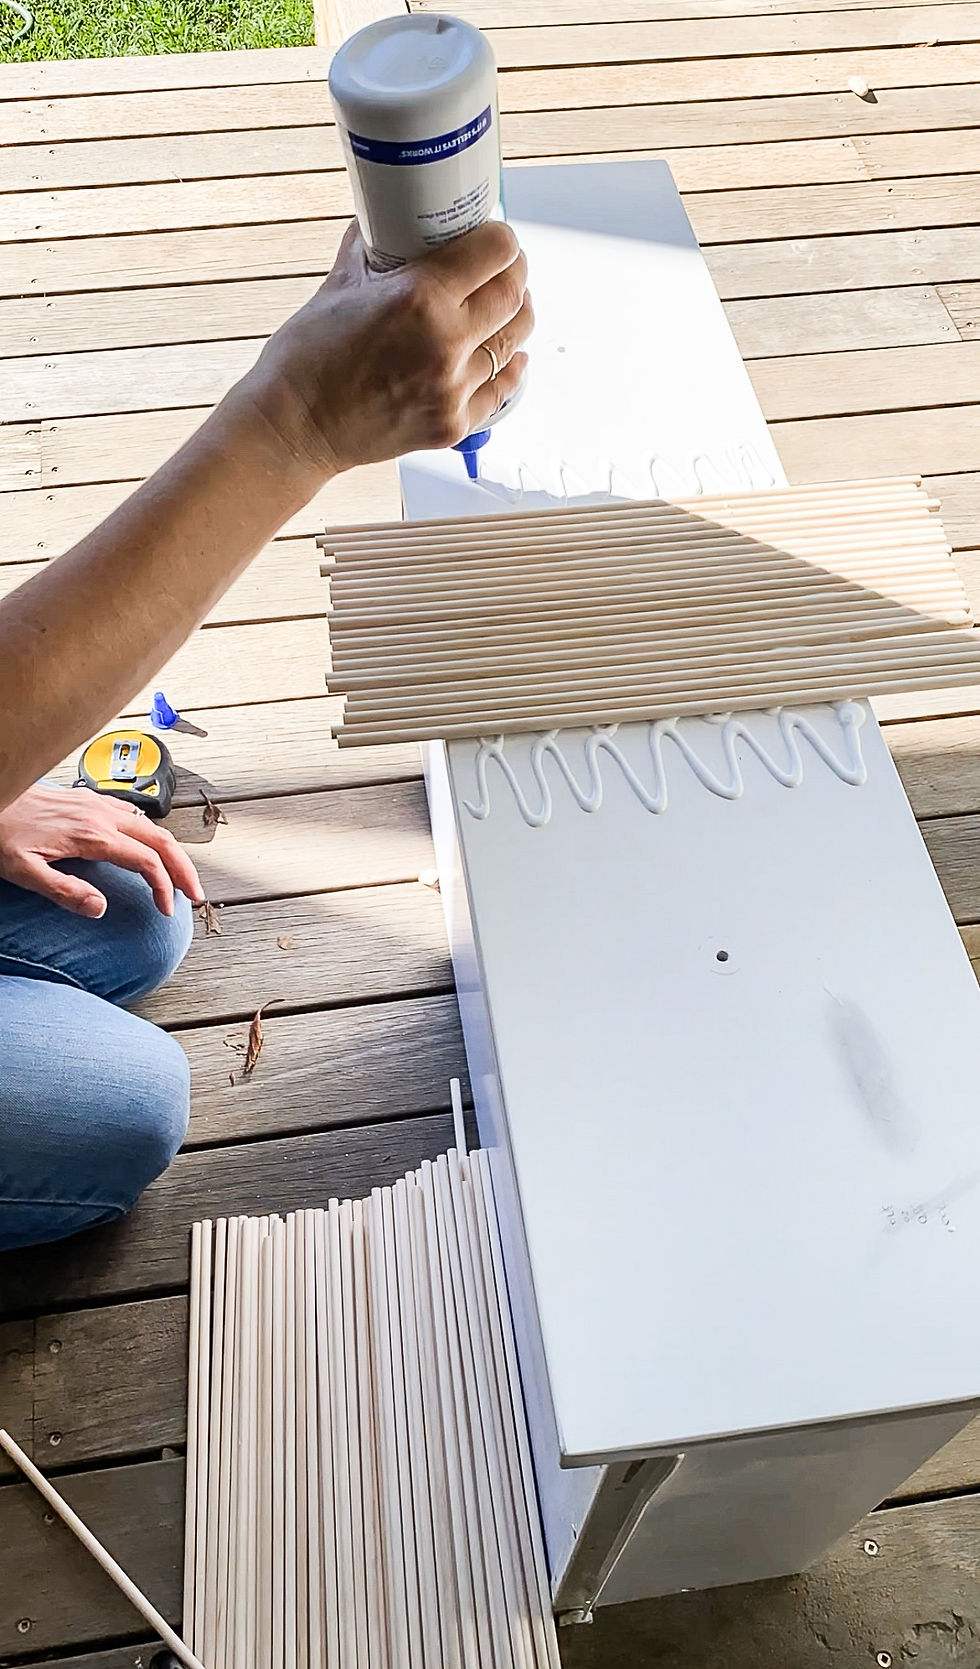
Dry Lay I spread the dowels out across one drawer first to see how they would sit. For me, the dowels sat slightly past the edges of the drawers which I actually liked so they would be a snug fit without too much gap between the drawer and carcass.

Measure As my dowels sat slightly off the edge, I decided to measure and mark the centres of each drawer so that would be my starting point to work outwards. By doing this I ensured a more refined even finish and avoided any of the drawers looking lopsided. *At this point you may want to measure and cut each dowel to length, but I decided to glue all mine on first then trim afterwards. Glue and Lay Starting from my centre line, I zigzagged the glue onto the drawer in sections of about 2 inches. I wanted to work in small sections to make sure the glue didn't dry out too quickly. Once I reached the edges I turned the drawers upside down to dry so the wight of the drawer kept everything in place. But I strongly suggest using clamps to keep everything in place while it dries - I really like these ones as you can use them one handed. Repeat for each drawer and let dry overnight.
Trim & Sand Before you trim your dowels you are going to want to tape them where you want to cut to avoid splintering. You then want to measure and mark where you want to cut your dowels. My drawers had gaps between each drawer which I didn't want, so I marked mine to be a little longer than the drawer fronts so there wasn't a gap. I used a jigsaw to cut mine, however you could also use a handsaw. Once cut, I gave the edges a very light sand using my orbital sander to remove any burrs and clean up the edges. You want to make sure not to take too much off, otherwise you'll round the edges too much. You can also just take a sanding disc/paper and sand it by hand to avoid over sanding.

*My drawers had a little recessed piece along the top of the drawer carcass, so I also filled this in with dowel to look seamless with the drawers - The gaps were all filled in with caulk and once painted looked seamless.

Prep Give everything a wipe over with a damp cloth to remove any dust, let dry then caulk the gaps between each dowel. This is not a necessary step but it will give your piece a much nicer end result once painted. To caulk you want to squeeze out a small bead/string between each dowel then wipe off the excess. I found it efficient to caulk a section then wipe back with a damp cloth. Let completely dry.

Paint If there are any parts of your drawer you don't want to paint, now is the time to cover them up. I only wanted to paint the fronts (including the inside edge of the fronts so I taped up everything else and covered them in plastic. If you're painting the sides of the drawers, I recommend taking off or taping runners and rollers so they don't become sticky and stiff, then give everything a wipe over with a damp cloth to make sure there's no dust on anything.
Depending on your item and paint, you may need to do a prime coat first. I didn't use a primer, but I did do three coats of paint to get a nice finish.
Time for paint! I used a spray gun, but you can also use a brush and roller. If you're using a roller you want to go with a small high density foam roller as this will give you the smoothest end result.

Finishing touches I wanted to upcycle the original knobs, so I gave them a quick spray in black spray paint then a spray in gold.

Now all you need to do is pop on your knobs and slide in your drawers and you now have a beautiful new dresser.

I hope this inspires you to take on a similar project!


Comments